
LISTEN
READ
As I shared in Episode 51 – 6 Things Every Author Needs, websites are a necessity. But if you don’t have a website, how do you create one?
In this post, you’ll discover how to build an effective author website in 10 steps, whether you’re creating it yourself or hiring a website designer.
An important reminder before you dive into building it is to make sure you have your goals and budget in front of you. Adhere to them as you plan and build your author website!
Creating a website is one area in which, at least for me, it’s easy to overspend and follow shiny object syndrome instead of staying focused on your goal and what your readers need.
Note that some of the links shared below are affiliate links, which means if you purchase a service through them, I get a small commission that helps to keep this podcast on the air without any upcharge to you.
Let’s get started!
#1 Purchase a domain name for your author website
I’ve always purchased my domain names from my website hosting companies, but you can also buy them directly from domain registrars.
Once you come up with an idea for a website address (URL), try to purchase it ASAP since domain names (especially .coms) go quickly.
When brainstorming what to name your author website, try to keep it short and on brand.
Shorter URLs are easier to remember and easier to type into a browser if you don’t have a link to it. As for branding, consider using your personal name or perhaps your tagline.
Note that you have to pay a nominal annual fee to retain your domain name, about $10-20/year. Some website hosts like mine at Inmotion Hosting [affiliate link] offer discounts or free credits for a domain name if you bundle it into one of their hosting packages.
#2 Decide who will build your website
Do you want to take the time to build your author website yourself or do you need to a website designer? Don’t assume, as I did with my first website, that hiring a designer means you won’t have to do anything. For example, you’ll still need to write your own website copy and notify them of your various preferences.
Count on website creation to take longer than you anticipated (especially if you do it yourself) and expect to pay $2-3k for a professional website design.
#3 Decide where you will build your website
A few of the most popular ones are WordPress, Wix, and Squarespace.
Base your decision on your future goals and current budget. Switching platforms can be done later, but it requires a financial investment to hire a hosting company or web designer do it for you (I don’t recommend doing it yourself if you’re not tech savvy or don’t have a lot of time to learn how to do it properly).
Note the difference between wordpress.org and wordpress.com. While the .com is tempting because it’s free, it has a number of limitations, the biggest of which is that you can’t sell from it, they place ads on it (unless you pay to have them removed), your data storage capacity is limited, and you can’t have custom themes.
I recommend wordpress.org because it’s yours to customize as you wish, but it does require hosting. WordPress.org is also the best pick if you plan to blog,
If cost is your primary concern, Wix might be your best bet with their free hosting. Keep in mind though, that free service means you don’t own your site; you play by their rules and if they were to ever close shop, your website goes away.
Squarespace offers a lot of good features, but I found it frustrating that they didn’t make their pricing plan easy to find. Here’s the link to their pricing page for your convenience so you don’t have to hunt for it as I did.
#4 Decide who will host your WordPress website
Two popular options are BlueHost and GoDaddy, although the latter has mixed reviews from users. I used it for a number of years without any problem, but others have not shared my experience. When I decided to build a second website, I switched to InMotion Hosting I’ve been pleased with both their offerings and stellar customer support these past couple of years.
Do your research to discover one that makes the most sense for you but MAKE SURE wherever you’re building/hosting your website that they offer an SSL certificate that lets browsers know that your site is safe and secure to be on (it’s that “s” that follows the http in the URL address, like this: https://)
#5 Select a theme
This is a set of templates that what will determine your site’s appearance.
There are lots to choose from – just make sure it’s mobile friendly!
Some of the more popular ones right now include:
#6 Write the copy (text) for each page
While you can add as many pages to your website as you want, there are four or five primary pages that you should definitely include:
- home
- about
- books
- blog (only if you plan to blog, but it is generally recommended for authors to help attract new readers to their site)
- contact
Each page will need its own unique copy and depending on whether or not you’re adept at copywriting (i.e., writing persuasively to encourage people to stay on your website as long as possible, download your freebie, and purchase your books), you might want to invest in a copywriting course. Ideally, all of this will be done (or be close to completion) before you work with a website designer.
#7 Integrate your ESP (email service provider)
To prevent sending out your newsletter one at a time to 10, 50, 100, or 1,000+ people, you’ll need to utilize an ESP. There are lots of options out there, and I’ve used four different ones over the years. Here are my top 2 picks:
-
- MailerLite (free for up to 1,000 subscribers) [affiliate link]
- ConvertKit (a little pricey, but better for large lists)
#8 Create and activate a sign-up form
If you’re an author, you need to attract new readers and then be able to follow-up with them regularly. This is why the ESP and a lead magnet or opt-in offer is so important. If you offer them something that’s valuable and desirable, they’ll be happy to provide their email address in return for that thoughtful and relevant item.
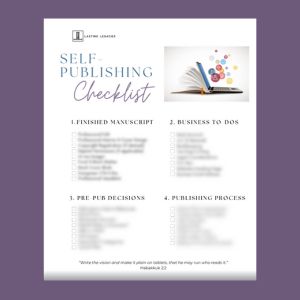
What exactly should your opt-in item be? It could be anything from a checklist or a 7-day devotional to a free short story or a quiz. It can be whatever is relatively easy for you to create yet is relevant and full of value for your readers/subscribers.
For more ideas and details on exactly how to create a lead magnet, be sure to check out Episode 44 – How to Create an Opt-in Offer (for non-fiction writers) and Episode 12 – How to Create and Distribute a Reader Magnet (for fiction writers).
#9 Add relevant plug-ins (on WordPress.0rg)
There are a multitude of plug-ins that you can use to enhance your self-hosted WordPress.org website. A few that I recommend are:
- Yeost SEO (particularly if you’re going to be blogging)
- Akismet (anti-spam) with Jetpack (for basic website stats),
- My Book Table (to showcase your books, especially f you have multiple),
- Disqus (for blog comment moderation)
#10 Include a privacy policy (legal requirement)
There you have it, fellow pen-pusher! By following these ten steps, you can build an effective author website. Go give it a whirl!
Did you find this blog post helpful? Share a comment about it below!
I really want to engage with you here in the podcast and provide you the information that you need where you’re at right now.
Would you like some help creating a writing and publishing plan?
I would love to help you! Be sure to check out my 1:1 coaching sessions. You can schedule that here.
———————————————————————————————-
Are You Looking for a Writing Community?
Join the Inkwell Collective!
The Inkwell Collective is a new membership community where Christian writers gather virtually to write, build their faith, establish meaningful connections, and get their book-related questions answered!
So what’s a Christian writer?
It’s anyone who is a Christian who writes. You don’t have to be writing a Bible study or devotional to join, just be a professing Christian who writes clean, God-honoring blogs and books. All genres and writing levels are welcome.
The general membership is free, and enables you to connect with fellow Christian writers. Ask questions, celebrate successes and ask for prayer 24/7. It’s like a Facebook group, but off of social media.
The paid basic membership enables you to discover the joys and benefits of writing together at one of our weekly virtual co writing sessions we have currently offered to and to participate in the live monthly Q&A sessions.
Don’t keep writing alone. Why not connect with other like minded writers?
Learn more about the Inkwell Collective. On that landing page, you will see a video tutorial so you get to see actually what it looks like inside. You can join for free to get a feel for it and see if you like it.
Come get connected with other Christian writers who don’t just support each other, but also encourage each other and grow in the Lord together.


0 Comments