
Do you want to write your life story, but you’re not sure how? Or maybe you’ve talked yourself out of it because …
- You don’t feel qualified as a writer.
- You’re overwhelming by the process.
- You’re worried about grammar rules and spelling mistakes.
- You’re more comfortable speaking their stories instead.
But there’s one big problem with traditional oral storytelling:
“Oral history is often lost within three generations.” Aaron Holt, National Archives and Record Administration
Let that sink in for a moment. Just three generations. That’s not very long.
Unlike today’s increasingly mobile society, I grew up surrounded by generations of family members. I was able to listen to family members tell the same stories repeatedly, causing me to think each detail of those stories would be engrained in my memory forever.
The reality? I’ve long since forgotten most of them.
And if that happened to someone who repeatedly heard the stories year after year while growing up, imagine how much more is lost when families rarely get to share their past due to living on the other side of the state, across the country, or around the world!
Don’t let your life story disappear forever. Following is how to write your life story in 4 steps.
Step #1 – Reflect before you begin to write your life story
Have you ever wished you’d asked a relative about a specific topic – and recorded their answer – before the family member passed away? I think it’s safe to say we all have.
Oh, I remember how my great-grandmother loved to drink cherry Kool-Aid, read from her Bible and have my sister and I brush her beautiful silver hair. But what was it like to raise three children during the Great Depression? To have a husband fight in WWI, a son in WWII and a grandson in Vietnam? What had her goals and dreams been?
And her daughter, my grandmother, how did she overcome the challenges of being a divorced mother in the 1940s and 1950s? Why did she obtain her beautician’s license and then never cut anyone’s hair?
If I were able to ask them these questions, it would cause them to reflect on their past actions and decisions.
It’s important to note that reflection is different from reminiscing.
We tend to reminisce about the good ol’ days. You know, the special occasions like weddings and birthdays, and lighthearted moments that make us laugh and smile.
Reflecting, however, is more introspective. It’s thinking back over the past to determine why something might have happened or how we’ve grown or changed over the years, perhaps as a result of difficult experiences.
Reflecting upon – and being willing to share about – both significant personal experiences and larger historical events are important to the preservation of history in general, and incredibly meaningful to your family.
Memories swirl through our minds daily. Take the time to write them down, both the lighthearted reminiscences and the meaningful reflections. At this phase, you’re not writing entire stories about the memories; you’re just noting the topics.
Step #2 – Record your memories
As we just discussed in step one (Reflect), our brains contain a seemingly never-ending supply of memories. The difficulty is often writing about them.
Oh, sure, you’ve jotted down the main ideas in a notebook, but to actually share the meat of the story? Well, that tends to be where you sit at your computer with your hands hovering over your keyboard as the cursor continues to blink on an empty screen.
You might type a sentence or two, shake your head and then delete what you just wrote. Then you try again, but you stop mid-sentence. For however much time you’ve allotted yourself to write, you languish over what to type and hardly anything at all gets written.
Many people call this writers block, but ultimately, I think it’s caused by fear:
- Fear of reliving a past hurt.
- Fear of ridicule or embarrassment.
- Fear of hurting someone else’s feelings.
- Fear of not remembering accurately
- Fear of speaking out
- Fear of not being a good enough writer
The list could go on.
Ultimately, you need to face your fears and write through them.
That’s easier said than done, I know.
Just remember that in the initial draft, you’re writing for your eyes only – no one else needs to see it. Write it all down – the good, the bad, and the ugly.
This is NOT the time to self-edit. That means you don’t delete what you wrote or exchange one word for a better one or worry one whit about how it sounds once it’s on the page.
Just write from the heart.
Author Carol Kent, in her book When I Lay My Isaac Down: Unshakable Faith in Unthinkable Circumstances, provides a compelling reason to tell your story in your words, without worrying what others will think of your emotions or actions:
“What’s in a story? The opportunity to give hope to somebody else. When we tell our real-life stories of what we have encountered on the journey of life, we break down barriers and create safe places to risk revealing the truth. We’ve quit pretending that everything is “fine” and that life is grand. When we share our stories with each other, we find a way of relating without the façade and without the need to impress. We can just be real. This brings tremendous freedom.”
Another important point is that you’re writing a life story. Not a list of past experiences. Not a recap of your favorite things. Not your genealogy. A story.
One that has a beginning, middle, and end in which you, the main character, have grown in some capacity along the way.
When you’re willing to share the good along with the bad, you’re allowing your readers – your family – to relate to you on a new level.
Step #3 – Revise your manuscript
After you have a rough draft written, set it aside for a week or two. Then come back and read it with fresh eyes.
This is the time to organize your content.
Many writers are challenged by how to put all of their content together so the story flows smoothly. My solution? Select a structure that makes sense to you and best conveys the information to your readers. Following are three of my favorite structures:
- Parts or Sections – When you have multiple stories (chapters) that fall under a similar category, the use of parts or sections help you stay organized. Keeping similar material grouped together is also appreciated by the reader.
- Turning Points – I never recommend that you write your life story chronologically from your earliest childhood memory onward since it bogs you down and burns you out. It also bores your readers. Instead, write the pertinent, meaningful stories that took place at any point in your life, THEN organize them chronologically. As in a novel, this builds interest and keeps your reader turning pages to the end.
- Theme – As you look over your content, you may discover an overarching theme. If this is the case, you may choose to divide your book into appropriate sections based on that theme.
Finally, don’t be afraid to play around with your material! Try different structures. Cut and paste the information, moving the content around until you’re pleased with the order and flow of the text.
Step #4 – Reveal your work!
Let others know that you’re going to write your life story. You don’t have to let them read it while it’s still a work in progress, but let them know that you’re working on it.
Following one of my legacy presentations at a retirement community, a gentleman I’ll call Sam shared his personal experience regarding this issue when his widowed mother passed away.
Sam and his sister began the process of going through their mother’s belongings in order to settle her estate and sell her home. After two solid days of sorting and packing, they approached the attic.
When Sam stuck his head through the attic door, he was tempted to simply shut it and walk away, selling everything that remained. “One half of the attic was filled, floor-to-ceiling, with stacks of yellowed newspapers and old magazines,” he said.
He and his sister instructed the local waste company to move the dumpster below the attic window and they began throwing piles of papers away by the armful.
“I literally had my hands outside the window ready to toss a pile of papers into the dumpster when I noticed a 3-ring binder,” Sam said.
Pulling his arms back inside, he opened the binder and was shocked to discover his mother’s life story in her unmistakable handwriting.
For years, he and his sister had begged their mother to document her experiences to no avail. She had waved them away, saying that she didn’t have a story worth telling.
Yet unbeknownst to them, she had spent hours upon hours writing her life story. And then she stored it in the attic, amid other random papers, which almost caused the story to be overlooked and lost forever.
Please don’t do that with your life story!
Tell at least one trusted person that you’re working on your story…and tell them where they might find it. Is it in the bedroom or in the living room? Is it handwritten in a notebook or typed on the computer?
If it’s on the computer, give them an idea where they might find it or what it’s saved as. Remember, most people have deceased loved ones’ computers wiped clean (erased) before donating or throwing away the equipment.
Finally, once your life story is finished, don’t keep it to yourself! Make several printed copies and share them with your loved ones and closest friends!
So there you have it: how to write your life story in 4 steps:
- Reflect
- Record
- Revise
- Reveal
More to Help You Write Your Life Story!
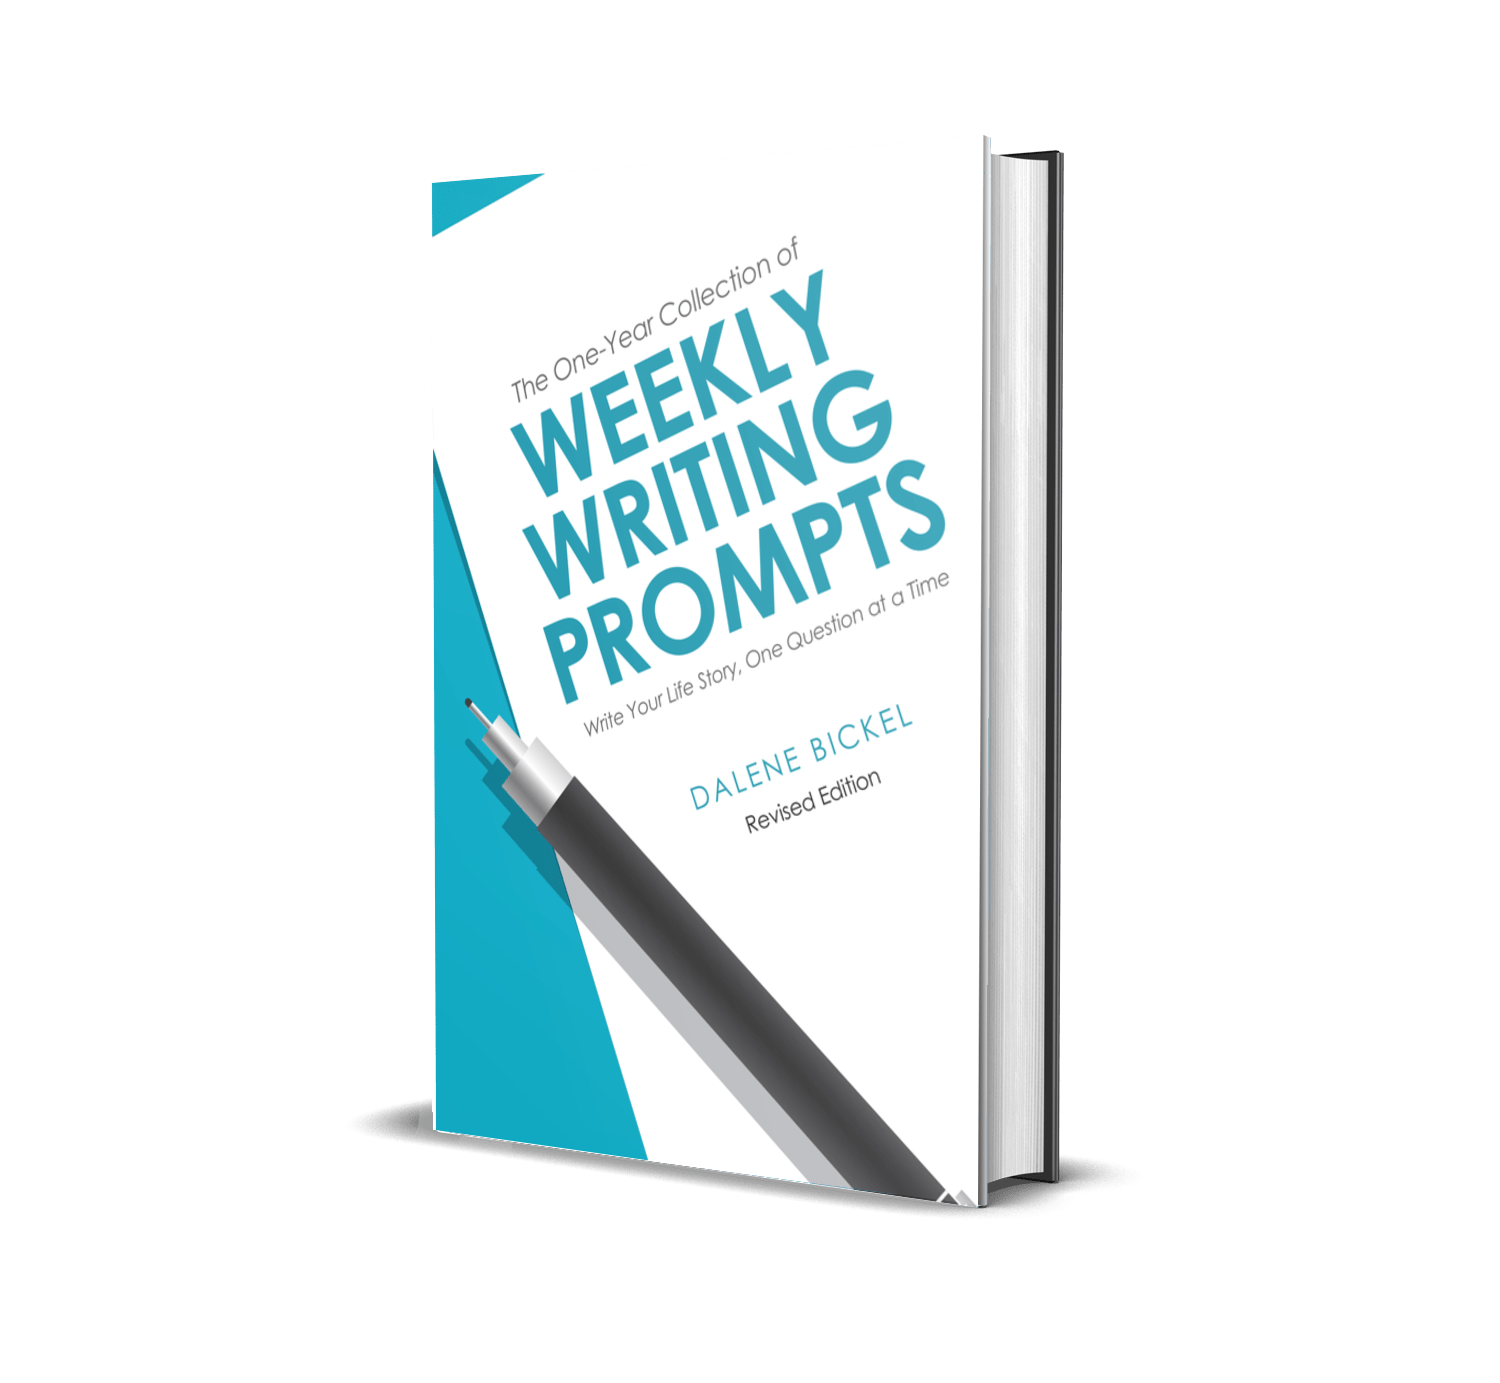
If you’d like more help, consider using my book, The One-Year Collection of Weekly Writing Prompts: Write Your Life Story, One Question at a Time.
This book of writing prompts removes the overwhelm and helps you focus your thoughts. You don’t have to write for hours on end; simply answer one question per week!
Discover how easy it is to document your experiences, values, and beliefs simply by answering one question a week.
This revised edition features:
- 52 writing prompts divided into 10 meaningful topics,
- 3 new chapters (including why your story is important, a simple method to get your ideas flowing, and what to do after you’ve written your responses to the prompts),
- lined pages to write your responses,
- and helpful writing tips.
Grab a pen, find a quiet spot and dive in! Your story awaits.

Join The Inkwell!
![]()
The Inkwell, hosted by Dalene Bickel, is your opportunity to develop a consistent writing routine, write in community, and fuel your faith.
Grab your pen and paper or open your favorite writing application and let’s write together LIVE via Zoom every week PLUS get free access to the monthly Craft Chat workshops!


0 Comments